
Understanding Sidewalk Trip Hazards: Safety, Compliance & Solutions
Grinding sidewalk trip hazard is a cost-effective method to eliminate uneven concrete surfaces that pose safety risks to pedestrians. Here’s what you need to know:
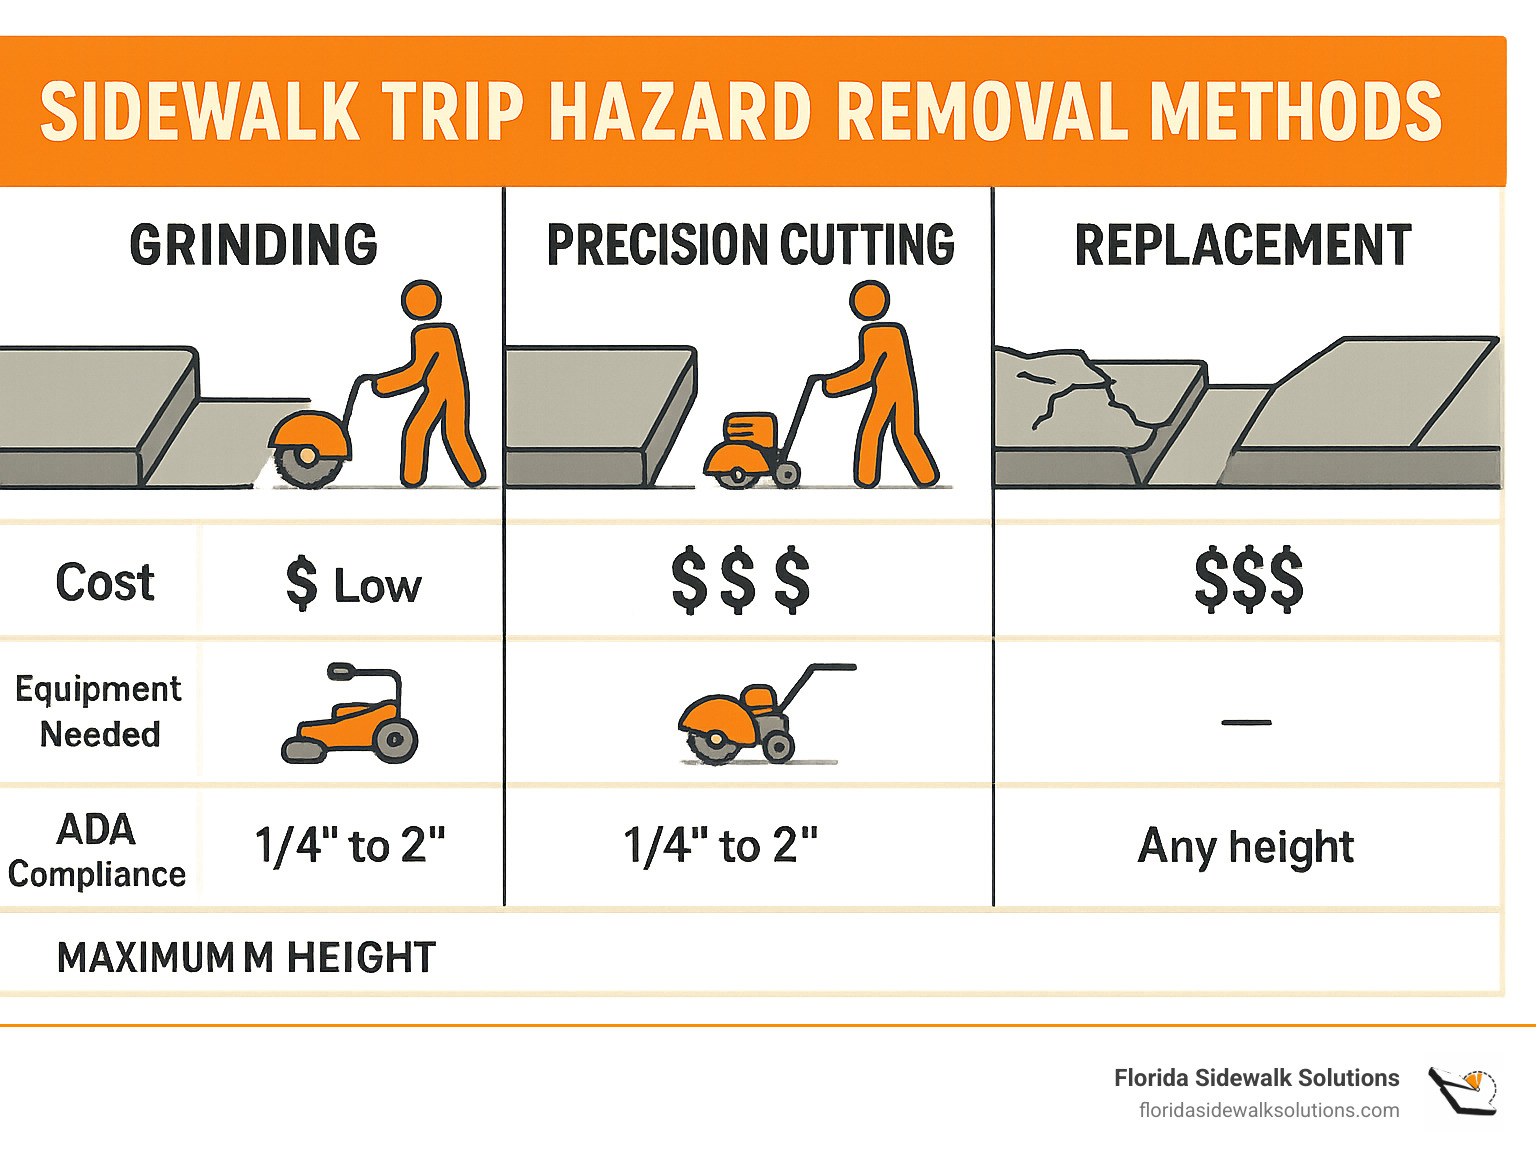
| Trip Hazard Solution | Best For | Maximum Height | Cost vs. Replacement |
|---|---|---|---|
| Grinding | Quick fixes up to 2″ | 1/4″ to 2″ | ~1/10 the cost |
| Precision Cutting | Edge-to-edge repairs | 1/4″ to 2″ | ~1/8 the cost |
| Replacement | Severe damage | Any height | Highest cost |
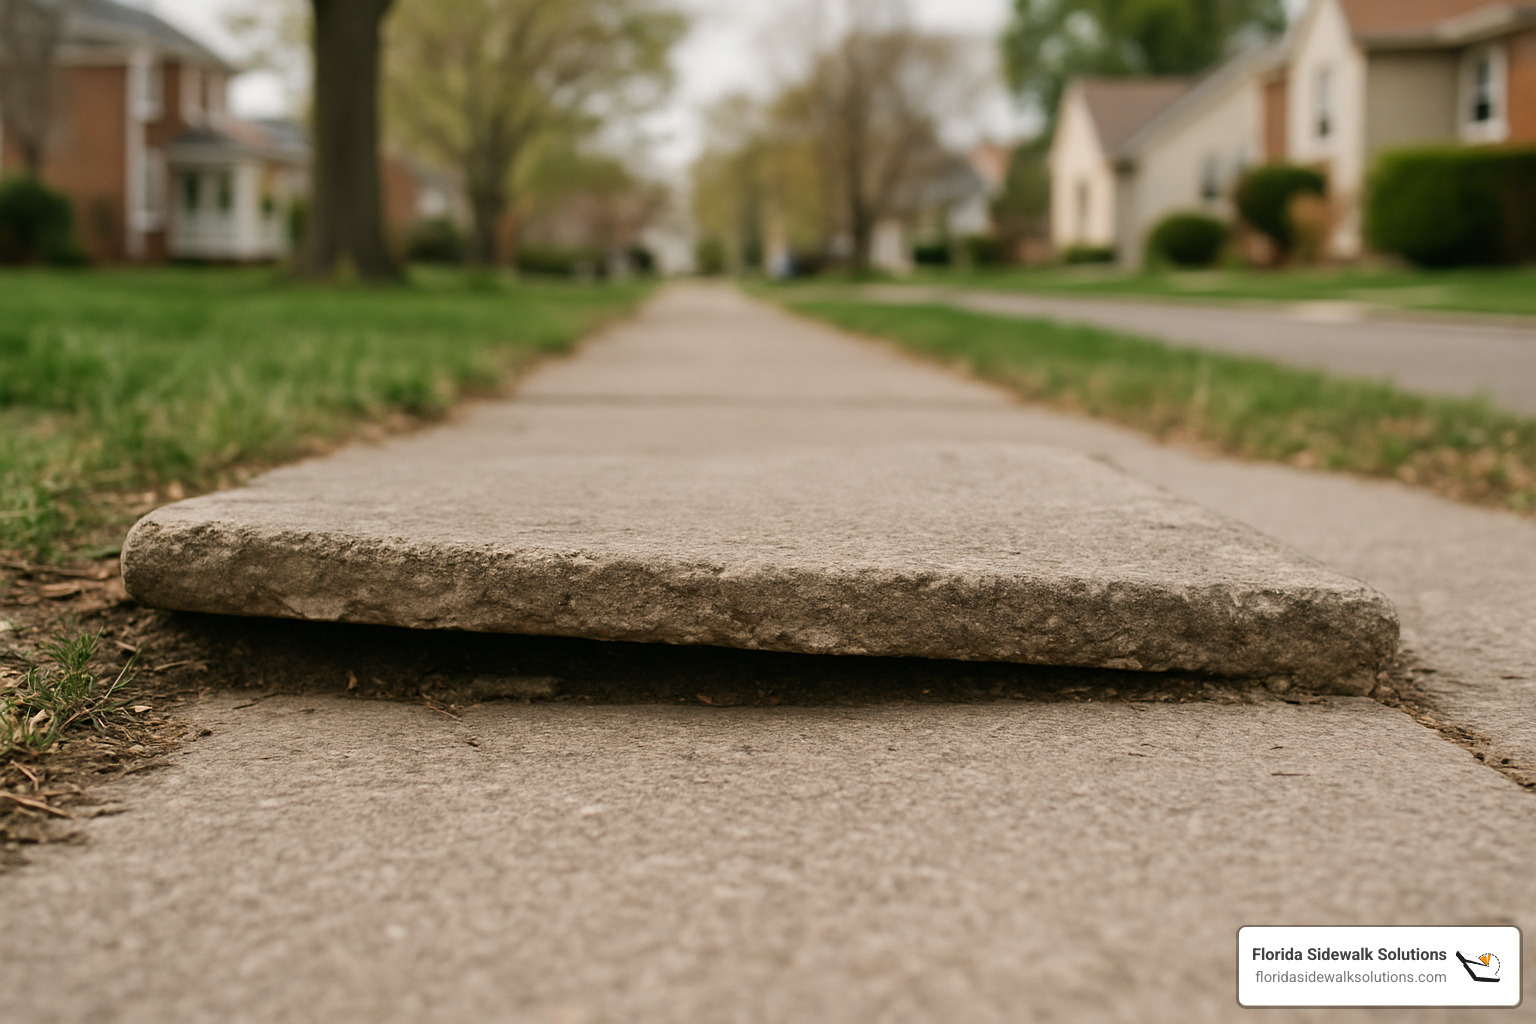
Uneven sidewalks are more than just eyesores—they’re serious liability issues for property owners and municipalities. When concrete slabs shift due to tree roots, soil settling, or freeze-thaw cycles, they create dangerous trip hazards that can lead to injuries, lawsuits, and ADA compliance violations.
The Americans with Disabilities Act (ADA) defines a trip hazard as any vertical change of 1/4 inch or more at a joint or crack. These seemingly minor offsets can cause major problems, especially for elderly pedestrians and those with mobility challenges.
For municipal maintenance managers facing tight budgets and public safety concerns, addressing these hazards quickly and cost-effectively is crucial. While complete sidewalk replacement might seem like the most thorough solution, it’s often unnecessarily expensive and disruptive.
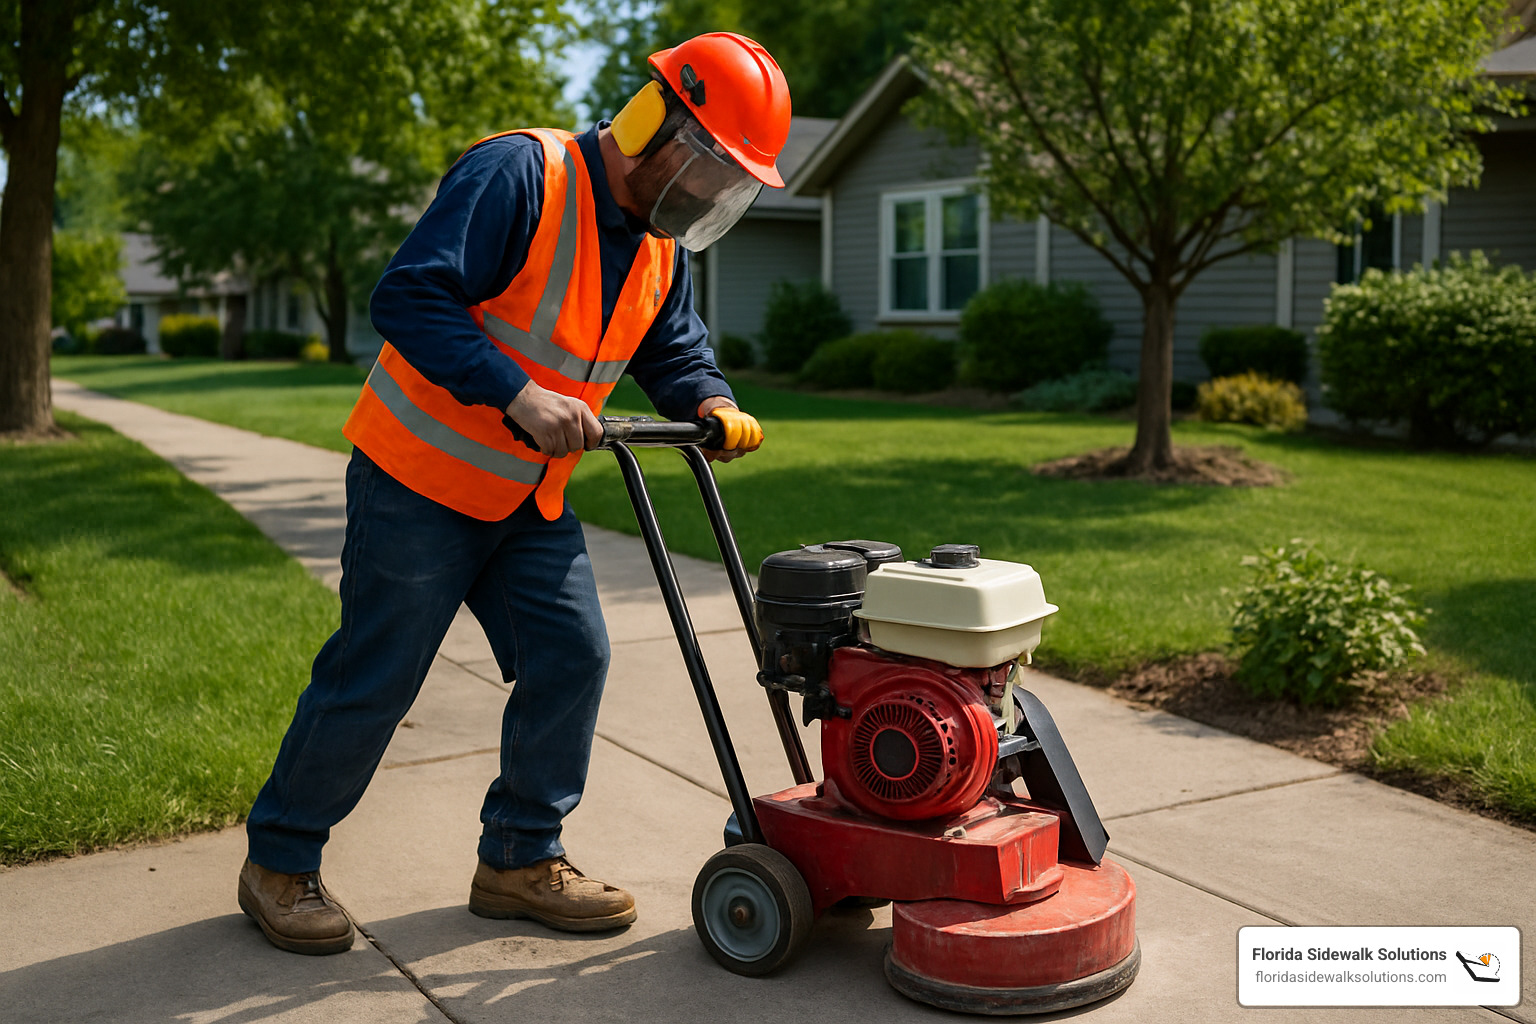
Grinding—also known as scarifying—offers a practical alternative that can save up to 90% compared to replacement costs. This process uses specialized equipment to sand down raised edges, creating a smooth transition between uneven panels.
However, not all grinding methods are created equal. Florida Sidewalk Solutions specializes in precision cutting technology that often outperforms conventional grinding in both results and cost-efficiency.
Glossary for grinding sidewalk trip hazard:
– concrete trip hazard repair
– fix sidewalk trip hazards
What Creates a Sidewalk Trip Hazard & Why You Must Act
Those cracks and uneven joints in your sidewalk didn’t appear overnight. They develop gradually, often so slowly you might not notice until someone trips or you receive a complaint. Here’s what’s typically happening beneath your feet:
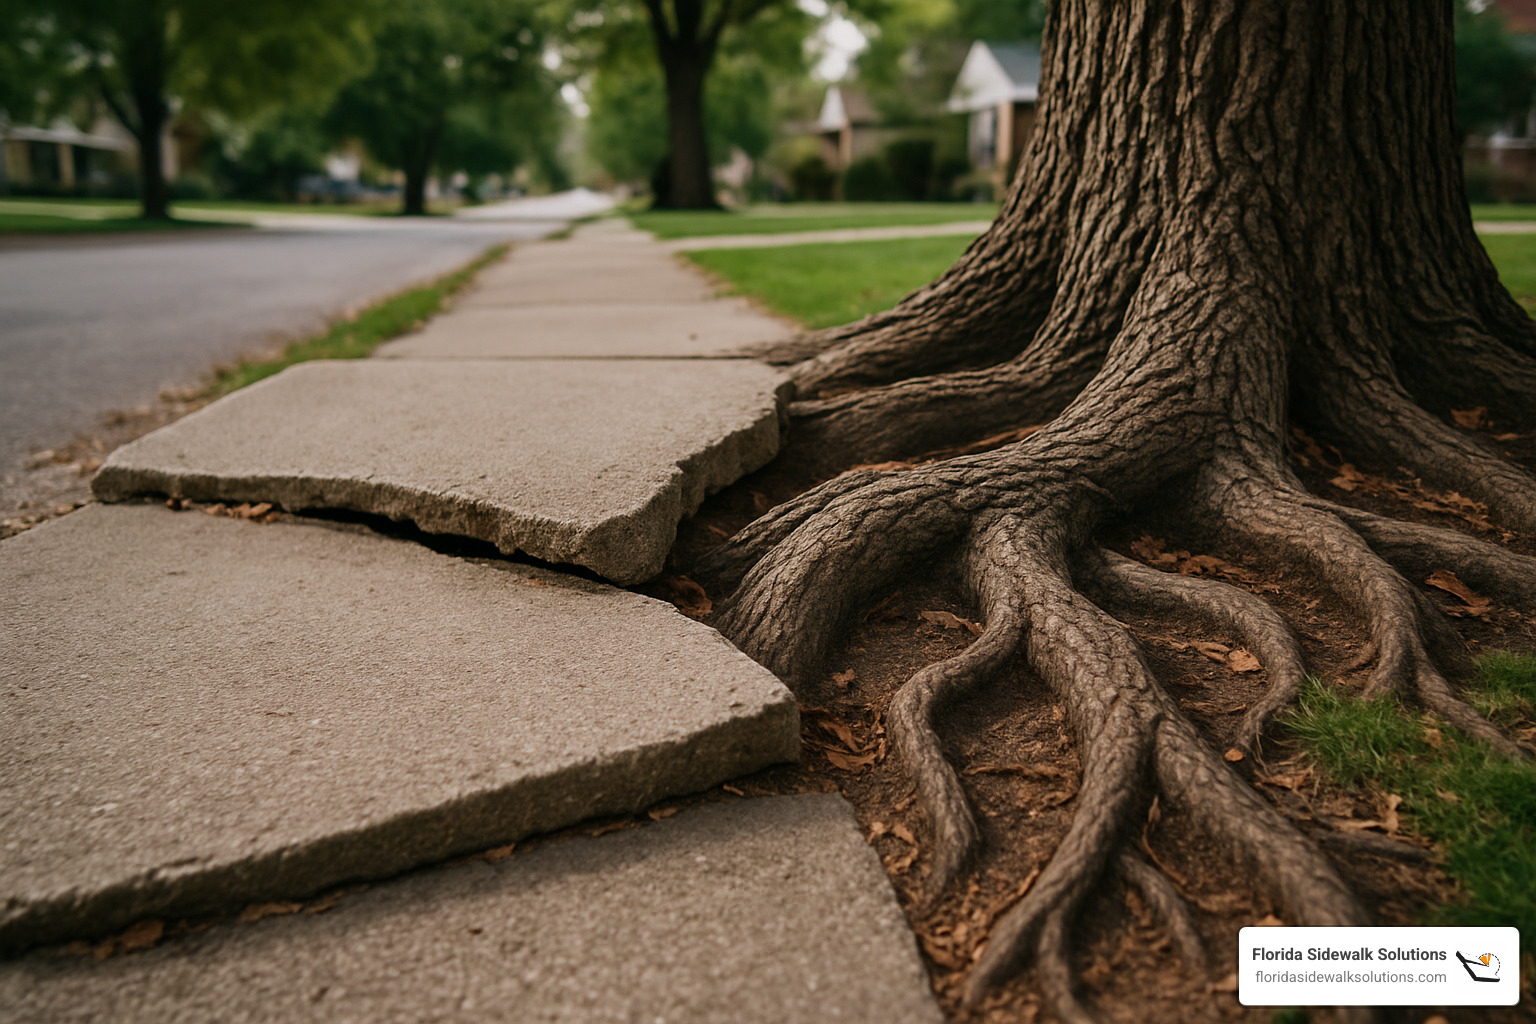
Tree roots are powerful forces of nature. As trees mature, their roots spread and grow, sometimes pushing upward on concrete slabs with enough force to create significant lifting at the joints.
Soil settling occurs when the ground beneath your sidewalk compacts unevenly. This natural process can cause certain sections to sink while others remain at their original height, creating those telltale uneven edges.
Freeze-thaw cycles are particularly troublesome in colder climates. Water seeps into tiny cracks, freezes and expands, then thaws—repeating this process gradually shifts concrete panels and widens the gaps between them.
Slab mismatches sometimes happen during initial installation or previous repairs when adjacent panels aren’t properly aligned, creating an immediate trip hazard that only worsens with time.
No matter what’s causing your uneven sidewalks, the Americans with Disabilities Act (ADA) is crystal clear: any vertical change of 1/4 inch or more constitutes a trip hazard that requires correction. This isn’t just about following rules—it’s about protecting people and your interests.
Why should you address these hazards immediately? The reasons go beyond mere compliance:
Legal liability is perhaps the most compelling reason. Trip-and-fall lawsuits can cost property owners thousands or even millions in settlements. Courts typically view sidewalk maintenance as a basic responsibility of ownership.
ADA compliance isn’t optional—it’s federal law. Businesses and municipalities must remove barriers to accessibility, including trip hazards on pedestrian walkways.
Insurance considerations matter to your bottom line. Many insurance companies offer premium discounts (typically 10-15%) for properties that maintain and document hazard-free walkways.
Accessibility is about human dignity. Uneven sidewalks create significant barriers for wheelchair users, the elderly, and those with mobility impairments—effectively excluding them from public spaces.
Public image reflects your values. Well-maintained walkways signal to customers, residents, and visitors that you care about their safety and comfort.
Our Trip Hazard Removal Service helps property owners throughout Florida address these issues quickly and affordably, often without the mess and expense of complete sidewalk replacement.
Hidden Costs of Ignoring Hazards
When property owners delay repairing sidewalk trip hazards, they often focus only on avoiding the immediate repair expense. Unfortunately, this short-term thinking overlooks the substantial hidden costs:
Medical claims can be devastating. A single trip-and-fall incident might result in broken bones, head injuries, or worse—leading to medical bills that dwarf the cost of repairs.
Legal fees accumulate quickly. Even if you successfully defend yourself in a lawsuit, attorney fees alone can run into tens of thousands of dollars. And if you lose? The settlement could be many times higher.
City citations add financial pressure. Many municipalities regularly inspect sidewalks and issue citations with hefty fines to property owners who fail to maintain safe walkways.
Snow-plow damage compounds the problem in northern regions. Plow blades can catch on uneven concrete edges, causing equipment damage and creating even larger trip hazards that require more extensive repairs.
Accelerated deterioration is the silent budget-killer. What starts as a minor lift between slabs often worsens exponentially over time as water infiltrates the gap, erosion increases, and freeze-thaw cycles amplify the problem.
We’ve seen this scenario play out countless times: a property owner notices a small trip hazard but decides it’s “not that bad.” Months later, someone falls and suffers injuries. Now the owner faces potential lawsuit costs, emergency repair expenses, and possibly increased insurance premiums—all far exceeding what addressing the hazard would have cost initially.
Grinding sidewalk trip hazard solutions offer an economical middle ground between doing nothing (and risking all these hidden costs) and complete sidewalk replacement. At Florida Sidewalk Solutions, we specialize in making these repairs affordable, minimally disruptive, and fully ADA-compliant.
Repair Options at a Glance
When facing those annoying sidewalk trip hazards, you’ve got several paths forward. Let’s walk through your options with an eye on what works best for different situations:
Complete replacement might seem like the obvious choice—tear out the old sidewalk and pour fresh concrete. It looks beautiful when finished and solves the problem completely. But it’s also the most expensive route, requires significant downtime (at least 24 hours before walking traffic), and creates disruption that neighbors won’t appreciate.
Mudjacking (also called slab jacking) offers a clever solution for sunken slabs by pumping material underneath to raise them back up. It’s effective for low spots but doesn’t help when the problem is a raised edge—plus in Florida’s sandy soil, it often proves to be a temporary fix at best.
Some contractors offer patching compounds—essentially creating cement ramps between uneven panels. While inexpensive upfront, these patches typically deteriorate quickly, look rather unsightly, and frequently need replacement within a year or two.
Precision cutting uses specialized equipment to create perfect bevels at trip points. This method reaches completely to panel edges, provides permanent ADA-compliant results, and offers excellent value. It’s why we at Florida Sidewalk Solutions have made this our specialty.
Grinding sidewalk trip hazard areas (sometimes called scarifying) uses abrasive equipment to wear down raised edges. It’s relatively quick and budget-friendly but comes with limitations we’ll explore below.
| Method | Cost (relative) | Disruption | Durability | Max Displacement | Appearance |
|---|---|---|---|---|---|
| Replacement | $$$$$ | High | Excellent | Unlimited | Excellent |
| Mudjacking | $$$ | Medium | Good | 3-4″ | Good |
| Patching | $ | Low | Poor | 2″ | Fair |
| Precision Cutting | $$ | Low | Excellent | 2″ | Good |
| Grinding | $$ | Low | Good | 2″ | Fair-Good |
Why Some Pros Skip “Grinding Sidewalk Trip Hazard” Work
Though grinding sidewalk trip hazard areas remains popular, many professionals (ourselves included) have concerns about this method:
Slab thinning is perhaps the biggest issue—grinding removes material from the top, potentially weakening the concrete, especially if it’s already thinner than the standard 4-inch depth. This can lead to premature cracking and failure down the road.
In northern states, freeze-thaw exposure becomes a serious problem. Grinding opens up concrete pores, allowing water to penetrate more easily. When that water freezes and expands, it can accelerate deterioration. Even in Florida, our occasional freezes can affect ground surfaces.
The aesthetic concerns are immediately obvious—ground areas typically look noticeably different from surrounding concrete, creating a patchwork appearance many property managers and homeowners find unacceptable.
There’s also a repeatability limitation—once a section has been ground, you typically can’t grind it again without seriously compromising the slab’s integrity. This matters because many trip hazards recur as underlying issues (like tree roots) continue causing movement.
Finally, standard grinding equipment often can’t reach panel edges completely, potentially leaving partial trip hazards that still violate ADA requirements.
When “Grinding Sidewalk Trip Hazard” Still Makes Sense
Despite these limitations, grinding sidewalk trip hazard areas remains a viable solution in certain scenarios:
For moderate displacements between ¼” and 2″, grinding can be effective and economical. When you’re facing tight budget constraints but need to address safety issues, grinding offers significant savings compared to replacement.
Grinding also makes sense for urgent safety concerns since it can be completed quickly with minimal disruption. The equipment is readily available, and most contractors can perform the work with minimal lead time.
If you’re already planning future replacement of the entire sidewalk within a few years, grinding provides an economical temporary fix to maintain safety and compliance in the meantime.
In areas with ongoing tree root issues where tree removal isn’t desired or possible, grinding can be a practical solution, even if it might need to be repeated as the roots continue to grow and shift the concrete.
At Florida Sidewalk Solutions, we’ve developed our precision cutting technology specifically to address the limitations of conventional grinding while maintaining significant cost advantages over full replacement. Our method delivers ADA-compliant results that look better and last longer—giving you the best of both worlds.
Step-by-Step Guide to Grinding Sidewalk Trip Hazard Safely & ADA-Compliantly
If you’ve decided that grinding is the right approach for your sidewalk trip hazards, doing it properly ensures both safety and compliance with regulations. Let’s walk through how to tackle this project the right way:
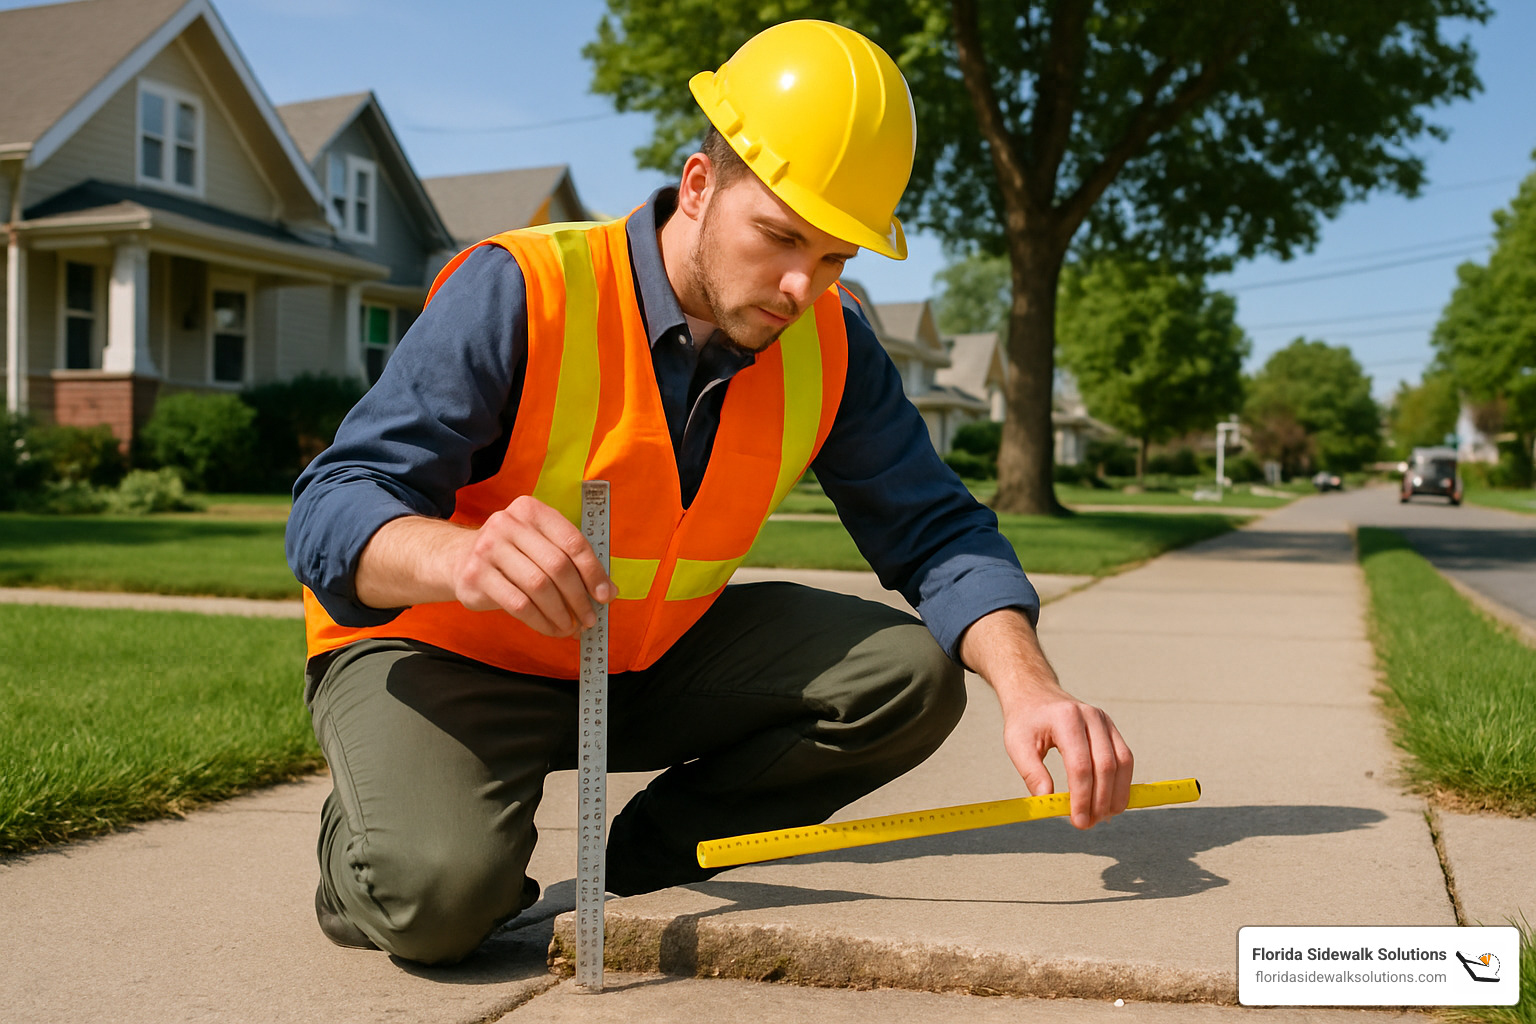
1. Inspect, Measure, Pull Permits
Before you grab any tools, take time to properly assess the situation. Start by measuring the vertical displacement using a digital level or feeler gauge – remember, the ADA considers anything 1/4″ or greater to be a trip hazard.
Next, check with your local building department about permit requirements. Many cities require permits even for repair work, and skipping this step could lead to fines.
Take plenty of “before” photos from multiple angles. These pictures aren’t just for your Instagram – they provide valuable documentation should questions arise later about the condition before repairs.
While you’re examining the area, try to determine what’s causing the displacement. Is it tree roots? Soil settling? Understanding the root cause helps determine if grinding will be a lasting solution or just a temporary fix.
Finally, check the concrete’s condition and thickness. The slab should be structurally sound and remain at least 3″ thick after grinding. If the concrete is crumbling or too thin, replacement might be your better option.
Want to explore all your repair options? Visit our Concrete Sidewalk Repair Options to Remove Trip Hazards page for more information.
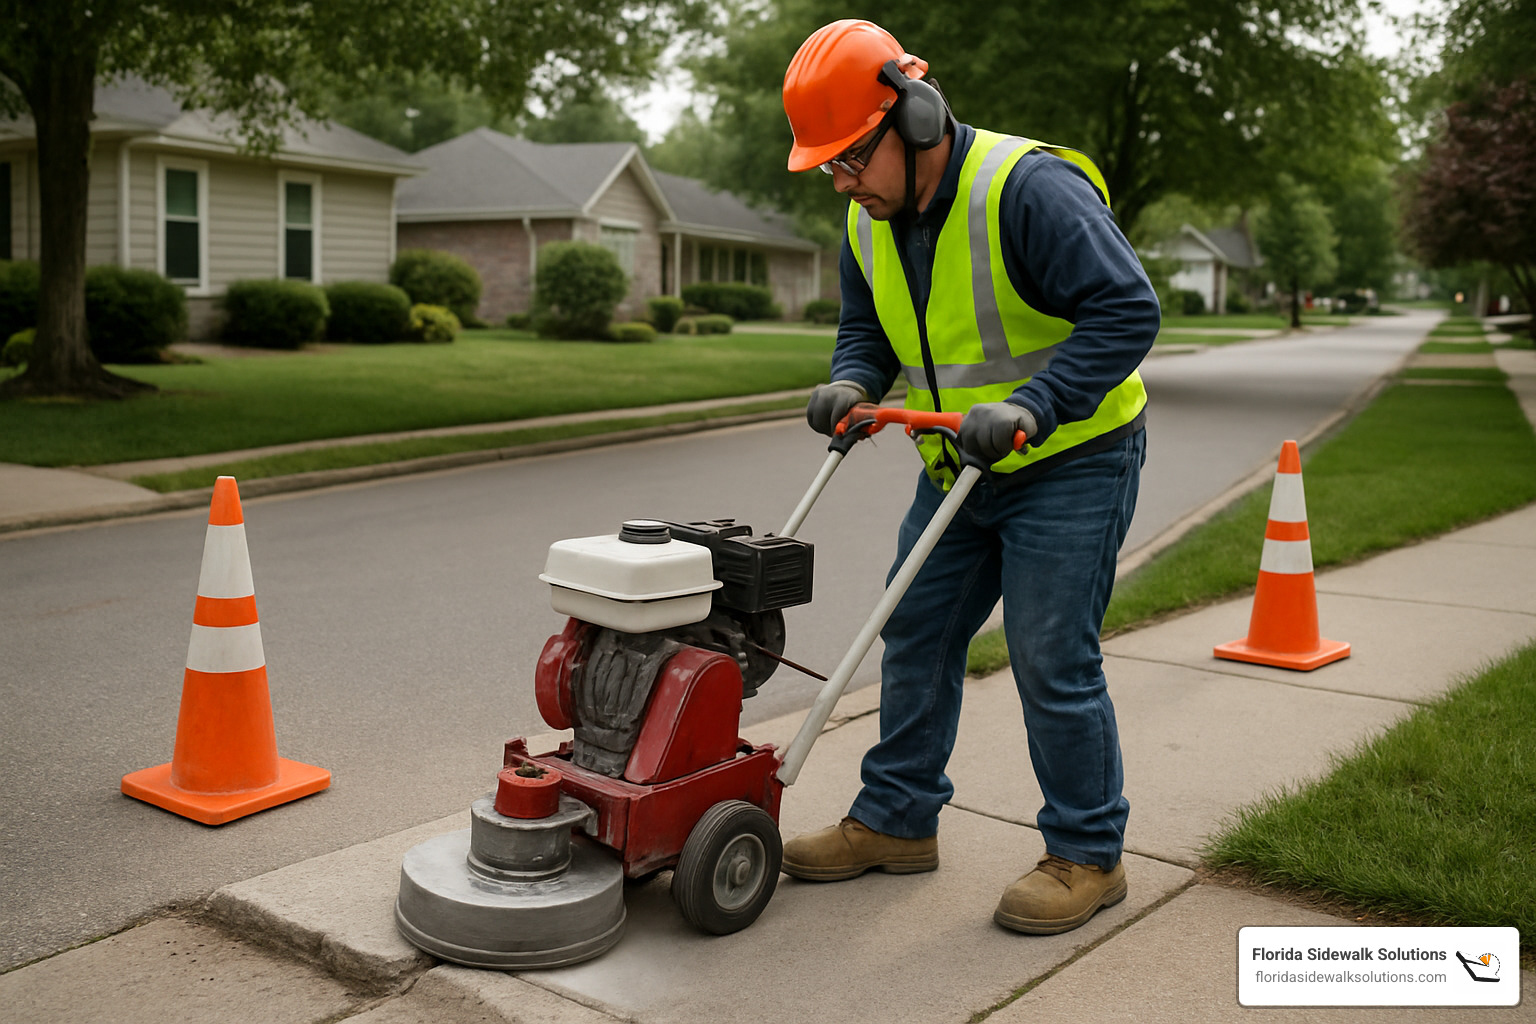
2. Mobilize Tools & PPE
Safety isn’t just a suggestion when grinding sidewalk trip hazard areas – it’s absolutely essential. The right equipment makes all the difference in both safety and results.
For larger areas, you’ll need a walk-behind concrete grinder or scarifier. Smaller areas and edges can be handled with an angle grinder equipped with a diamond cup wheel. Regardless of which you use, a vacuum system with HEPA filtration is non-negotiable for dust control. Concrete dust contains silica, which can cause serious lung problems when inhaled.
Your personal protection arsenal should include an N95 respirator (minimum), safety glasses or a face shield, hearing protection, heavy-duty gloves, and steel-toed boots. If you’ll be kneeling, add knee pads to that list – your future self will thank you!
OSHA takes dust control very seriously, and so should you. A quality dust-shroud attachment connected to your vacuum system isn’t just about following rules – it’s about protecting your lungs and those of anyone nearby.
3. Rough-Cut the Bevel (If > ½”)
For larger displacements (over 1/2″), a two-stage approach works best. Start by cutting a shallow groove with a concrete saw, which creates a guide for grinding and reduces the total material you’ll need to remove.
A tapered wooden bridge jig can be incredibly helpful here. This simple tool helps maintain the proper slope ratio during your initial cutting, ensuring ADA compliance from the start.
Speaking of compliance, the ADA has specific slope requirements: for displacements up to 1/2″, maintain a 2:1 horizontal-to-vertical ratio (that’s 2″ horizontal for every 1″ vertical). For anything larger, use a 12:1 ratio (12″ horizontal for every 1″ vertical).
If you’re tackling a longer trip hazard, break the work into manageable sections. This approach helps maintain consistent results throughout the repair.
4. Grind in Passes
The secret to a smooth, compliant result is proper grinding technique. Begin with a coarser diamond wheel to remove material efficiently, then work your way to finer grits.
Keep your passes overlapping by about 50% – this ensures uniform removal without creating ridges. And whatever you do, keep that grinder moving! Holding it in one spot is a rookie mistake that can create depressions or even burn the concrete.
Always work from the highest point toward the lower section. Check your progress frequently with a straightedge to verify your slope is developing correctly. For every 1/2″ of vertical displacement, you should grind back approximately 6″ horizontally to achieve the proper ratio.
Be careful not to remove more material than necessary. Over-grinding weakens the concrete and can create new problems down the road.
5. Finish & Clean
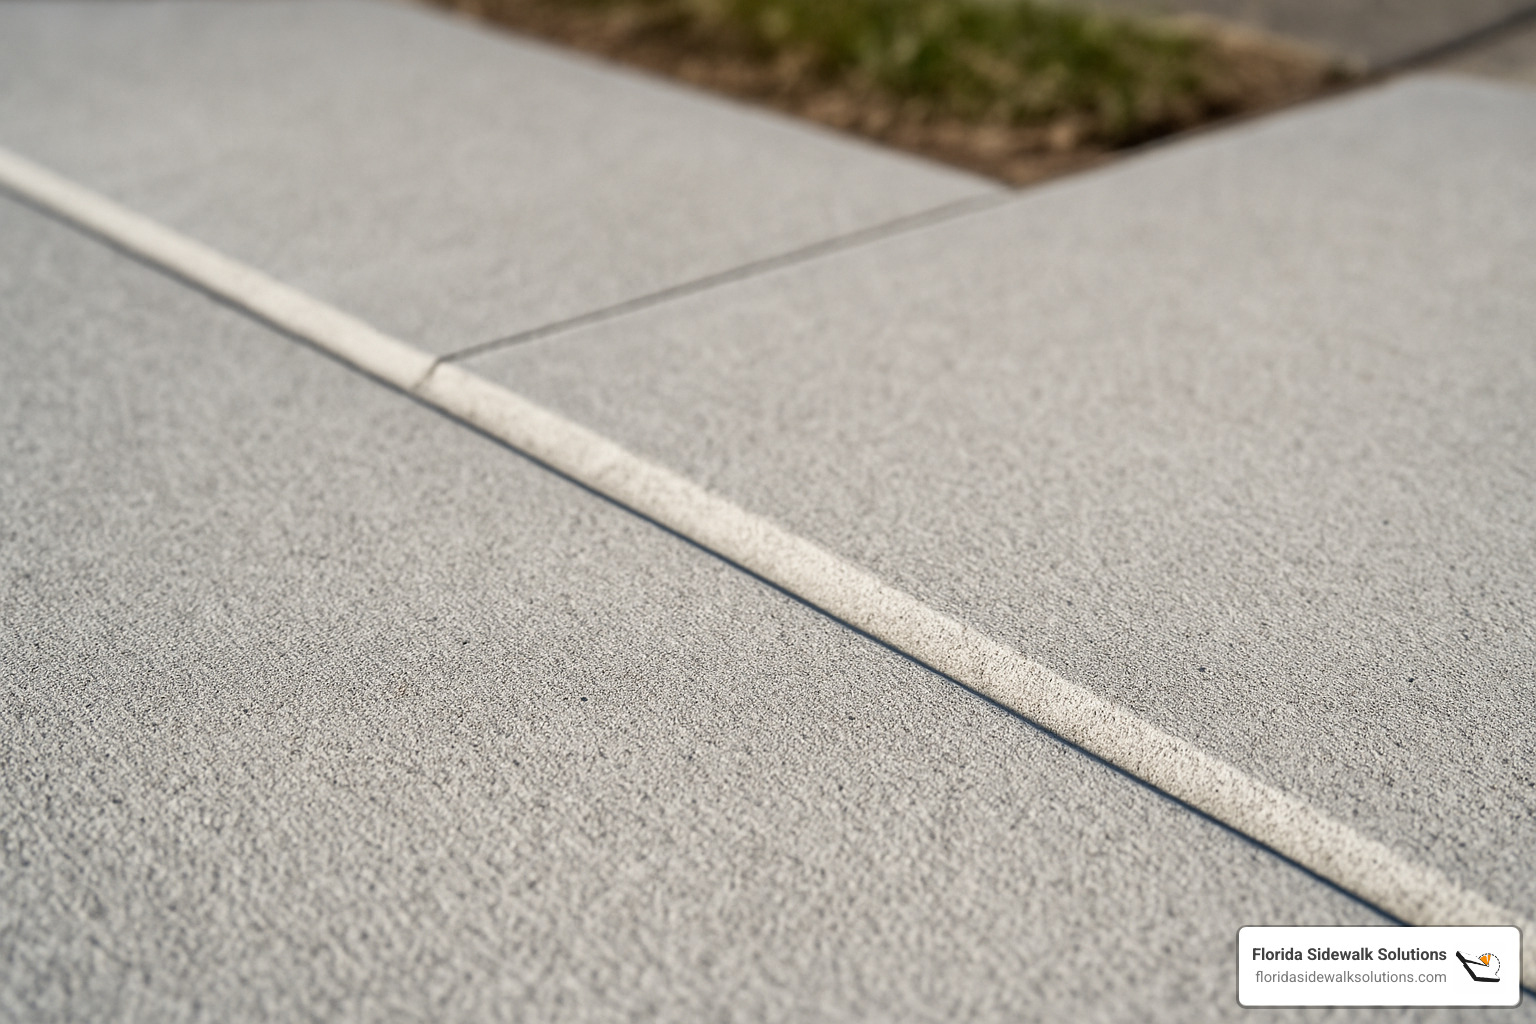
The finishing touches make all the difference between a mediocre repair and a professional one. After completing your rough grinding, switch to a finer diamond wheel for the final pass. This creates a smoother finish that blends better with the surrounding concrete.
The finished surface should have a slightly roughened texture similar to a broom finish – this provides adequate traction for pedestrians. Avoid making the surface too smooth, as this could create a slipping hazard when wet.
Once grinding is complete, thoroughly clean the area with a HEPA vacuum to remove all concrete dust. This isn’t just about appearances – it’s about safety and environmental responsibility.
Before you pack up, verify that the repaired surface has a non-slip coefficient of friction of 0.5 or above, as required by ASTM C-1028 standards. Also check that you’ve addressed the entire trip hazard, including those tricky edges and corners.
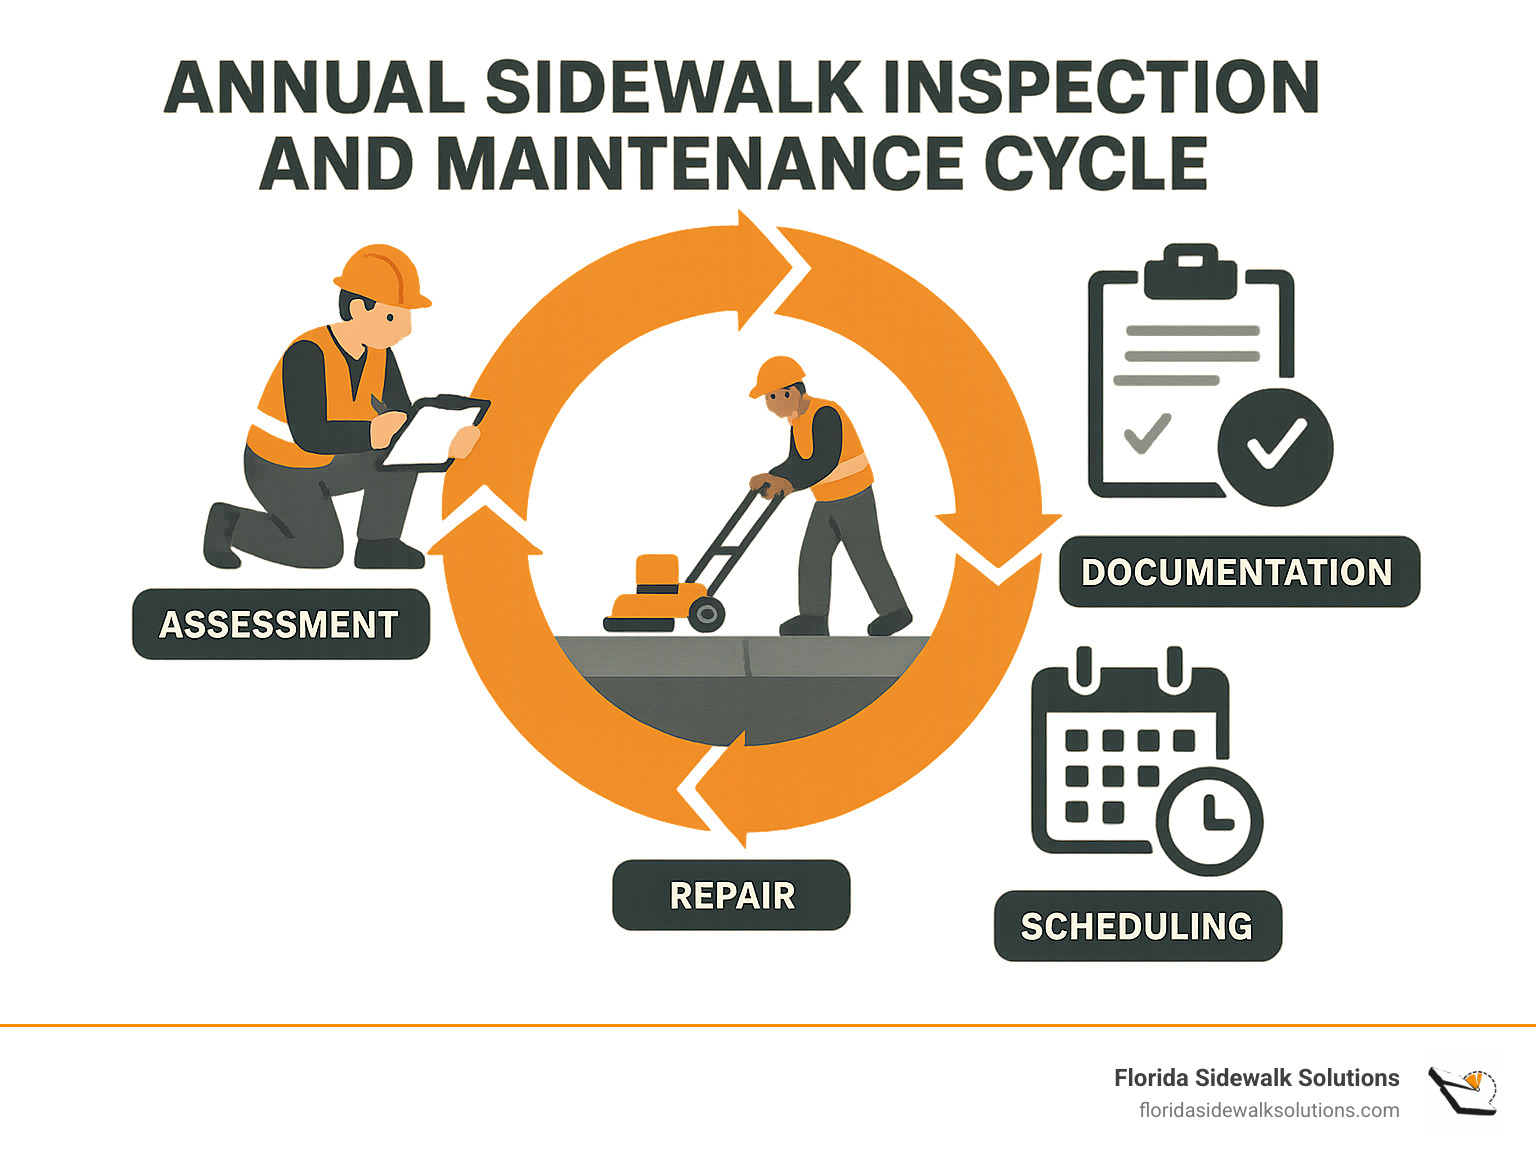
6. Re-open Walkway & Log Documentation
Your work isn’t quite done after the grinding is complete. Proper documentation is your best protection against future liability issues.
Take “after” photos from the same angles as your “before” shots. Record the vertical displacement you addressed and the horizontal distance of the repair. Update your maintenance logs with detailed information about the repair, including dates, locations, and methods used.
This is also the perfect time to schedule your next inspection. Annual reviews of all walkways help catch new trip hazards before they become serious problems. In some cases, applying a penetrating concrete sealer to the newly exposed concrete can extend the life of your repair.
While grinding sidewalk trip hazard areas is a viable DIY option for some property owners, many find that hiring professionals like Florida Sidewalk Solutions provides better results with less hassle. Our patented cutting technology often delivers superior outcomes compared to conventional grinding, with pricing that remains highly competitive.
Pros, Cons & Damage Risks of Grinding
When it comes to addressing uneven sidewalks, grinding sidewalk trip hazard areas offers a compelling mix of benefits and limitations worth understanding before you decide.
Pros:
Let’s talk about the good news first. Grinding is incredibly cost-effective—typically about 1/10th the price of completely replacing concrete sections. This makes it a budget-friendly option for property managers and homeowners alike.
The convenience factor is hard to beat, too. Unlike replacement that requires days of curing time, grinding allows walkways to reopen almost immediately. Most grinding repairs wrap up in minutes per hazard, not days. Plus, you won’t be dealing with chunks of broken concrete to haul away—just dust that’s easily cleaned up.
Perhaps best of all, you’ll see immediate results. There’s something satisfying about watching a trip hazard disappear before your eyes, rather than waiting for new concrete to set and cure.
Cons:
Now for the trade-offs. When we grind concrete, we’re actually removing material from the slab. This thinning process can potentially weaken the concrete if overdone. The newly exposed surface also has more open pores, making it more vulnerable to water penetration over time.
Let’s be honest about aesthetics—ground areas rarely match the surrounding concrete perfectly. There’s usually a visible difference that some property owners find disappointing.
Grinding also has its limitations. It’s really only appropriate for displacements up to about 2 inches. Beyond that, other solutions make more sense. And once you’ve ground a section, that’s usually it—you typically can’t grind it again without risking structural integrity.
Potential Damage Risks:
In Florida we’re lucky to avoid freeze-thaw cycles, but in colder regions, ground concrete faces accelerated deterioration as water seeps in, freezes, expands, and creates new cracks.
Technique matters tremendously. Improper grinding can cause concrete edges to chip or crumble. Excessive grinding might compromise the structural integrity of thinner slabs. And holding grinders in one spot too long—a common mistake—can actually burn and discolor the concrete surface.
For those interested in equipment specifics, professional-grade machines like the EDCO CPM-8 scarifier are commonly used for larger grinding projects.
While Florida Sidewalk Solutions offers a reliable Concrete Grinding Service, we often recommend our precision cutting method instead. This patented approach delivers superior results by addressing many of the limitations inherent to traditional grinding.
Mitigating Downsides After Grinding Sidewalk Trip Hazard
If grinding is your chosen solution, you can take several steps to minimize potential problems down the road.
Applying a quality penetrating sealer helps protect those newly exposed pores from water infiltration. For appearance concerns, concrete stains can help the ground area blend better with surrounding concrete—a huge plus for visible walkways.
If you’re in a colder climate, use pet-friendly ice melt products during winter to minimize freeze-thaw damage to ground areas. And regardless of location, make inspecting ground areas part of your annual maintenance routine to catch any deterioration early.
For high-visibility areas where appearance really matters, consider applying a thin overlay or microtopping after grinding. This extra step can dramatically improve the finished look while providing additional protection.
By understanding both the benefits and limitations of grinding sidewalk trip hazard areas, you can make informed decisions about whether this approach meets your specific needs or if alternative methods might serve you better in the long run.
Prevention & Ongoing Compliance
Let’s be honest—dealing with trip hazards after they form is like treating a toothache. Wouldn’t it be better to prevent the problem in the first place? Here’s how smart property owners stay ahead of sidewalk issues:
Root barriers are your first line of defense when planting trees near walkways. These simple shields direct root growth downward instead of letting them push up your concrete. It’s a small investment that can save thousands in future repairs.
Proper sub-grade preparation might not be exciting, but it’s crucial. When soil under a new sidewalk isn’t properly compacted, it’s practically an invitation for future settling and cracking. Take the time to create a solid foundation—your future self will thank you.
Have you ever noticed those lines cut into sidewalks? Those strategic control joints aren’t just for decoration. They actually control where concrete naturally cracks as it expands and contracts. Proper placement can prevent random cracking that leads to trip hazards.
One of the smartest habits you can develop is conducting annual walkway audits. Walk your property with a critical eye—or even better, a small level—to catch slight changes before they become ADA violations. Spring is usually the perfect time for this after winter’s freeze-thaw cycles have done their worst.
Moisture management around sidewalks is often overlooked but incredibly important. When water consistently pools against or flows under concrete, it erodes the supporting soil. Make sure your drainage directs water away from walkways, not toward them.
Finally, never underestimate the value of quality installation. The right concrete mix, proper thickness (minimum 4 inches), and appropriate reinforcement can extend your sidewalk’s lifespan dramatically. It might cost a bit more upfront, but quality installation pays dividends for decades.
For more detailed strategies on protecting your investment through proactive maintenance, check out our guide on How Sidewalk Trip Repair Can Protect Your Property.
Determining Responsibility: Homeowner vs. Municipality
“So who’s actually responsible for fixing that sidewalk?” It’s one of the most common questions we hear, and the answer isn’t always straightforward.
Start by checking your property deed language. Some deeds specifically outline maintenance responsibilities for public walkways adjacent to your property. This legal document often has the final say in determining who handles what.
Local city ordinances vary tremendously across Florida. Generally, they fall into three categories:
1. The city accepts full responsibility for sidewalk maintenance
2. Property owners bear full responsibility for adjacent sidewalks
3. A shared approach where the city handles major issues while property owners manage routine maintenance
Even when repairs are clearly your responsibility, most municipalities require permits before work begins. This ensures repairs meet local codes and ADA requirements. Don’t skip this step—unpermitted work can result in fines or even removal and replacement at your expense.
Many cities have established inspection schedules where officials regularly evaluate sidewalk conditions. If they find issues, you’ll typically receive a notice with a deadline for repairs. These timeframes can range from 30 days for serious hazards to several months for minor issues.
The rules vary significantly across Florida communities like Davie, Fort Lauderdale, Coral Springs, Boca Raton, West Palm Beach, Miami, and Fort Myers. We always recommend contacting your local public works department for the specific regulations in your area.
Regardless of legal responsibility, maintaining safe walkways protects everyone—including you from potential liability issues. When in doubt about grinding sidewalk trip hazard areas or other repair options, professional assessment can save you time, money and headaches down the road.
Frequently Asked Questions about Sidewalk Trip Hazards
What vertical height can be safely ground?
When it comes to grinding sidewalk trip hazard areas, not every uneven sidewalk is a good candidate. Generally, vertical displacements between 1/4 inch and 2 inches respond well to grinding. Anything larger than 2 inches typically needs full replacement to ensure safety and durability.
Your concrete needs to maintain at least 3 inches of thickness after grinding. This ensures the sidewalk keeps its structural integrity and won’t crack under normal pedestrian traffic. If your sidewalk is already thin, grinding might not be your best option.
Do I need a permit before I grind?
The short answer? It depends on where you live. Most Florida municipalities require some form of permit before modifying sidewalks, even for simple grinding work. Some cities have created streamlined permit processes specifically for trip hazard repairs, recognizing their importance for public safety.
Before firing up that grinder, contact your local building department or public works office. At Florida Sidewalk Solutions, we’ve steerd the permitting maze countless times and can often help our clients through this process. It’s always better to spend a little time getting proper permits than facing potential fines later!
Will the ground area look different and can it be tinted?
Yes, ground areas will look different from the surrounding concrete—there’s no getting around this fact. The texture is typically rougher, and you’ll notice the color might appear lighter because grinding removes years of surface oxidation and contaminants.
The good news? This aesthetic difference can be minimized. Concrete stains and tints work wonderfully after grinding to help the repaired area blend with surrounding sections. For best results, wait until the ground area has thoroughly dried (usually 24-48 hours) before applying any stain. Many of our clients are pleasantly surprised by how inconspicuous a properly stained repair can be.
How long does grinding take compared to replacement?
The time savings with grinding sidewalk trip hazard areas is dramatic. For perspective, a typical trip hazard—say 6-8 feet long with a 1-inch displacement—can be ground in about 15-30 minutes. You’ll have a usable walkway almost immediately.
Contrast this with replacement: demolition, hauling away old concrete, setting forms, pouring new concrete, and waiting for it to cure. That’s a 1-2 day process minimum before anyone can use the walkway again. For busy commercial properties or public spaces, this time difference alone often makes grinding the preferred option.
Can all trip hazards be fixed by grinding?
No, and we’re always honest about this with our customers. Grinding has specific limitations:
Grinding isn’t suitable for very large displacements over 2 inches, severely cracked or deteriorating concrete, very thin existing slabs (less than 4 inches thick), sidewalks with serious underlying structural issues, or situations where appearance is the absolute top priority.
In these cases, we might recommend our precision cutting method or, when necessary, full replacement. We’ll never recommend grinding when it’s not the right solution for your specific situation.
How long will a ground repair last?
The longevity of your repair largely depends on what caused the displacement in the first place. If that tree root is still growing and pushing up your sidewalk, even the best grinding job will eventually need attention again. However, if the displacement was caused by initial settling that has stabilized, your repair could last many years.
Under normal conditions with stable soil, you can typically expect 5-10 years of service from a quality grinding repair. This makes it not just a quick fix, but a durable medium-term solution. For even better results, consider addressing the underlying cause of the displacement when possible—like installing root barriers for nearby trees.
For more permanent solutions that often outperform grinding, check out our Concrete Trip Hazard Repair service, which uses our patented cutting method.
Conclusion
Grinding sidewalk trip hazard areas represents a practical and budget-friendly solution for property owners concerned about ADA compliance and potential liability issues. When done correctly, grinding eliminates dangerous trip points quickly—often at just one-tenth the cost of completely replacing the concrete.
But let’s be honest about grinding’s limitations. It sometimes struggles to reach panel edges completely, isn’t suitable for severe displacements, and can leave behind aesthetic differences that some property owners find concerning. That’s exactly why we at Florida Sidewalk Solutions developed our patented precision cutting method—a technique that addresses these common grinding limitations while still keeping costs well below full replacement.
Our specialized approach delivers several key advantages:
- We can reach right to the very edge of concrete panels
- Our method creates perfectly smooth transitions between uneven sections
- Every repair meets or exceeds ADA compliance standards
- We complete work quickly with minimal disruption to pedestrian traffic
- The finished result looks significantly better than traditional grinding
Whether you’re managing commercial properties throughout Miami, overseeing municipal sidewalks in Fort Lauderdale, or simply need to fix trip hazards at your Boca Raton home, we tailor our solutions to your specific needs and budget constraints.
Don’t wait for someone to trip and fall before addressing dangerous sidewalk conditions. Being proactive not only protects pedestrians but also shields you from potential lawsuits and the much higher costs of emergency repairs. The time to act is before an incident occurs—not after.
Contact Florida Sidewalk Solutions today for a free, no-obligation assessment of your sidewalk trip hazards. Our experts will evaluate your specific situation and help you determine whether grinding, our precision cutting method, or another approach makes the most sense for your property and budget.


